

Connect Claude or ChatGPT
Let Claude or ChatGPT write your ideas, story, screenplay and shots, while StoryBook keeps, checks and analyses them.
What the connector does
The connector lets an AI assistant work inside your StoryBook team. Claude and ChatGPT both connect the same way, to the same connector URL. The assistant writes the ideas, story, screenplay, shots and dialogue. StoryBook checks what it writes, stores it, and analyses how your episodes perform.
- StoryBook makes no AI call of its own for work the assistant does. Nothing from a Claude or ChatGPT session is sent to Gemini.
- The web app is unchanged. The Generate buttons still use Gemini exactly as before. You can use either one, or both, on the same episode.
- The assistant acts as you. It sees only the team you pick, and only what you allow.
The connector URL is https://<your StoryBook domain>/api/mcp. StoryBook also shows it under Settings → Connected apps → Add StoryBook to Claude or ChatGPT.
Add the connector in Claude
Claude can add a connector on the Free, Pro, Max, Team and Enterprise plans. The Free plan allows one custom connector. A connector added in Claude works on the web, in Claude Desktop and in the mobile apps.
On a Free, Pro or Max plan:
- In Claude, open Customize → Connectors and click Add custom connector.
- Paste the connector URL and click Add. Leave the OAuth settings as they are: Use Claude's published identity is the default and works with StoryBook. Register automatically works too.
- Claude sends you to StoryBook. Sign in with your usual StoryBook account.
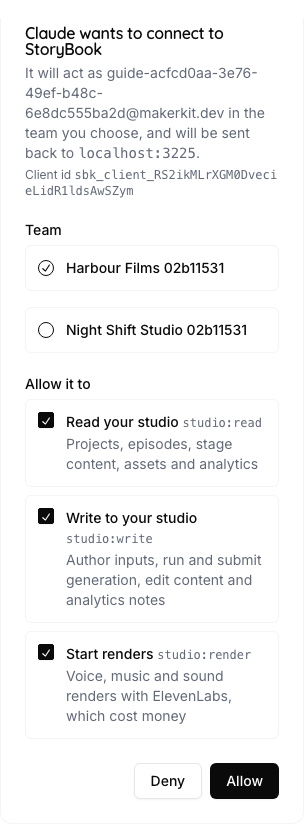
- The page reads "Claude wants to connect to StoryBook". Pick the team Claude may work in.
- Under Allow it to, tick what Claude may do (see the scopes below), then click Allow. Deny cancels the connection.
On a Team or Enterprise plan, an Owner adds the connector once for the organization: Organization settings → Connectors → Add → Custom, choosing Web if asked, then the connector URL and Add. Each member then opens Customize → Connectors, finds StoryBook with the Custom label, clicks Connect, and follows steps 3 to 5.
To use it in a chat, click +, then Connectors, and make sure StoryBook is on.
Add the connector in ChatGPT
ChatGPT connects through developer mode, which is available on the Plus, Pro, Business, Enterprise and Education plans, on the web. The Free plan cannot add the connector. In a Business, Enterprise or Education workspace, an admin may have to allow developer mode or custom connectors in the workspace settings first.
- In ChatGPT, open Settings → Security and login and turn on Developer mode.
- Open Apps (the developer documentation calls this page ChatGPT Plugins) and click + to create an app for a remote MCP server.
- Give it a name, such as StoryBook, and a short description. Paste the connector URL under Connection.
- For authentication, choose OAuth. ChatGPT finds StoryBook's sign-in by itself. If it asks how to register, keep its default; a client ID and secret are not needed.
- Create the app. ChatGPT sends you to StoryBook: sign in, check that the page reads "ChatGPT wants to connect to StoryBook", pick the team, tick the scopes and click Allow.
- ChatGPT lists the tools it found. To use them, start a new chat, open the + menu, choose Developer mode and select StoryBook.
Screenshot to come: ChatGPT's create dialog with the connector URL and OAuth selected (
/images/docs/claude-connector/chatgpt-create-app.png).
Screenshot to come: The StoryBook consent page reading "ChatGPT wants to connect to StoryBook" (
/images/docs/claude-connector/chatgpt-consent.png).
Screenshot to come: A ChatGPT chat in developer mode with StoryBook selected, answering whoami (
/images/docs/claude-connector/chatgpt-whoami.png).
ChatGPT asks you to confirm each tool call that changes something. Tools that only read run without asking. You can let it remember your answer for the rest of a conversation.
After StoryBook adds or changes tools, open the app in ChatGPT and click Refresh, then start a new chat.
A connection belongs to one team, in Claude and in ChatGPT. To let an assistant work in a second team, add the connector again and pick the other team.
Without sign-in: a personal access token
Some tools cannot sign in through a browser. For those, create a token yourself.
- Open Settings → Connected apps in your team.
- Under New personal access token, give the token a name, such as the device that will use it.
- Choose its scopes and click Create token.
- Copy the token when it appears, then click I have saved it. It is shown once. StoryBook keeps only a fingerprint, so a lost token cannot be shown again. Create a new one instead.
- Give the token to your tool as a bearer token in the
Authorizationheader.
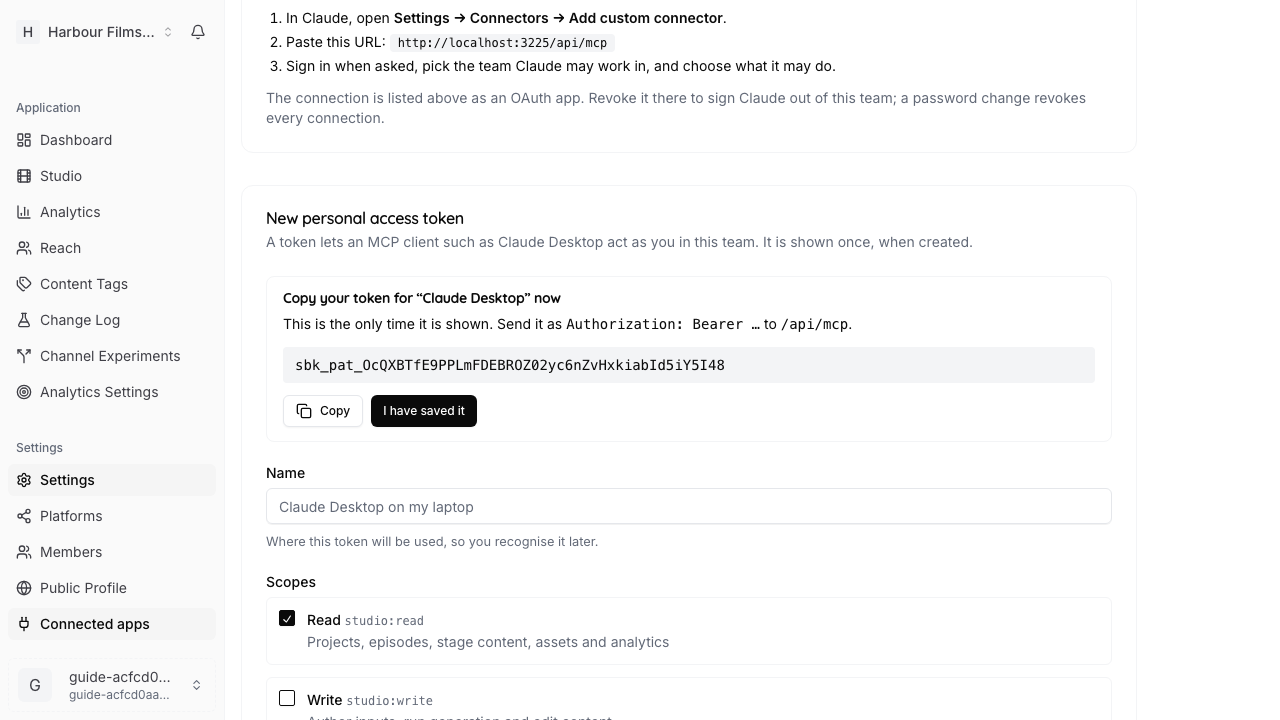
A token works for one team and one person, and can be revoked at any time.
What each scope allows
You choose the scopes when you approve the connection or create the token. Pick the least the assistant needs.
| Scope | Shown as | Allows |
|---|---|---|
studio:read | Read your studio | Read projects, episodes, stage content, assets and analytics. |
studio:write | Write to your studio | Create and edit the inputs you would type yourself, generate stages, and add notes, tags and experiments. |
studio:render | Start renders | Start ElevenLabs voice, music and sound-effect renders (start_voice_render, start_audio_render) and check on them (get_render_progress). These cost money. |
Publishing is not on the list. Publishing to a platform always stays a button in the web app.
The workflow
The assistant follows the same stage order as the web studio: ideation, story, screenplay, shots, audio cues. A stage opens when the one before it has content. The assistant can read a short guide to this order from the connector itself, so you can simply ask it to "work on episode 3".
Each generated stage goes through the same four steps.
- Start. The assistant starts a generation for one stage of one episode. StoryBook answers with the brief: your project settings, the characters and locations, the earlier stages, the shape the answer must take, and a quality checklist.
- Write and submit. The assistant writes the content from the brief and submits it part by part. For shots, a part is one scene.
- Corrections. If a part does not fit the required shape, StoryBook sends back the errors field by field. The assistant fixes the part and submits it again. Nothing is saved to your episode yet.
- Finalize. When every part is accepted, the assistant finalizes. StoryBook saves the whole stage in one step, the same way it saves a Gemini result. Shots then continue into audio cues.
If the assistant stops half way, nothing half-written reaches your episode.
While the assistant is working
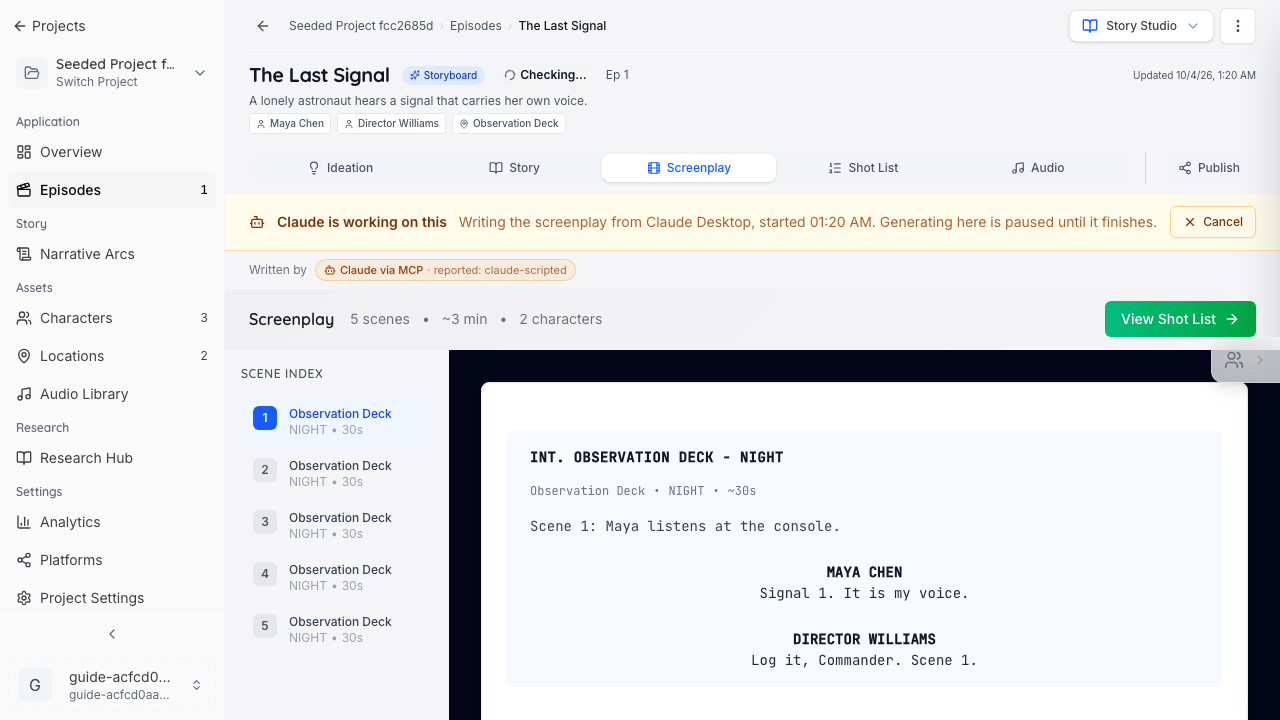
The studio page for that stage shows a banner: Claude is working on this (or ChatGPT is working on this: the banner names the app), followed by what it is writing, which app it came from and when it started. While the banner is up, the buttons that start a Gemini generation on that page are paused ("Generating here is paused until it finishes"), so the web app and the assistant cannot overwrite each other. Click Cancel in the banner to end the run.
Who wrote what
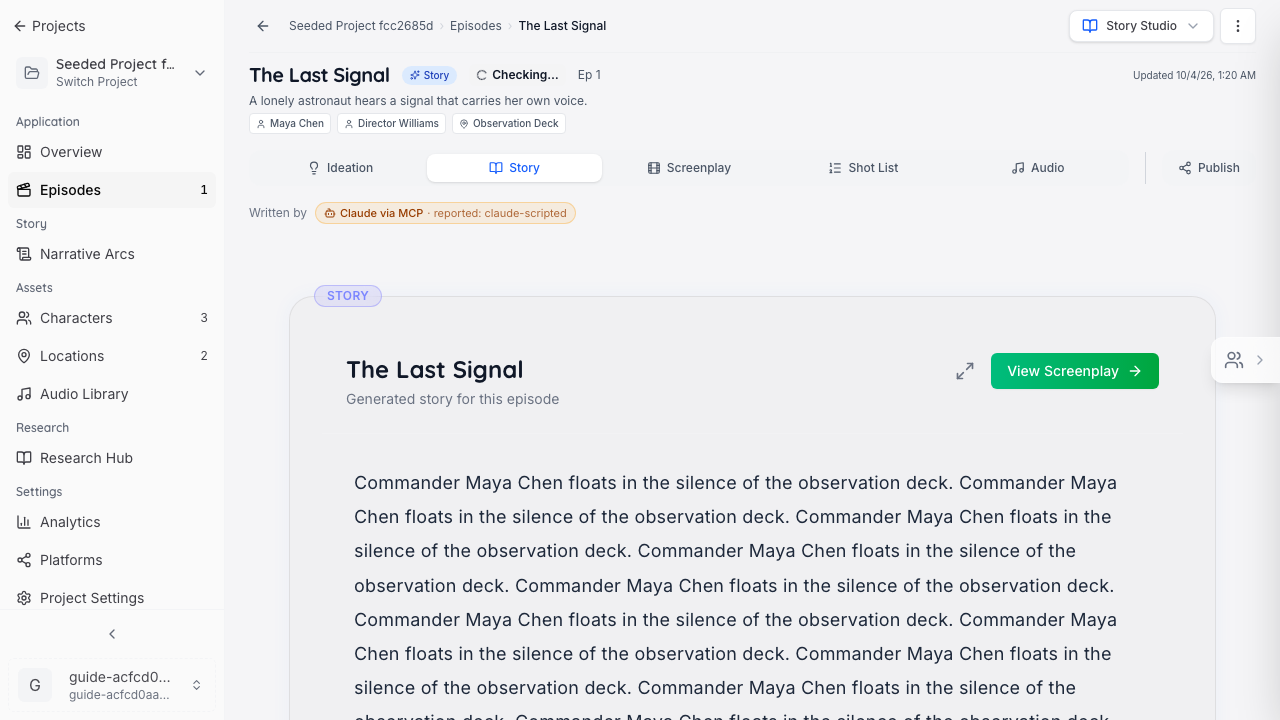
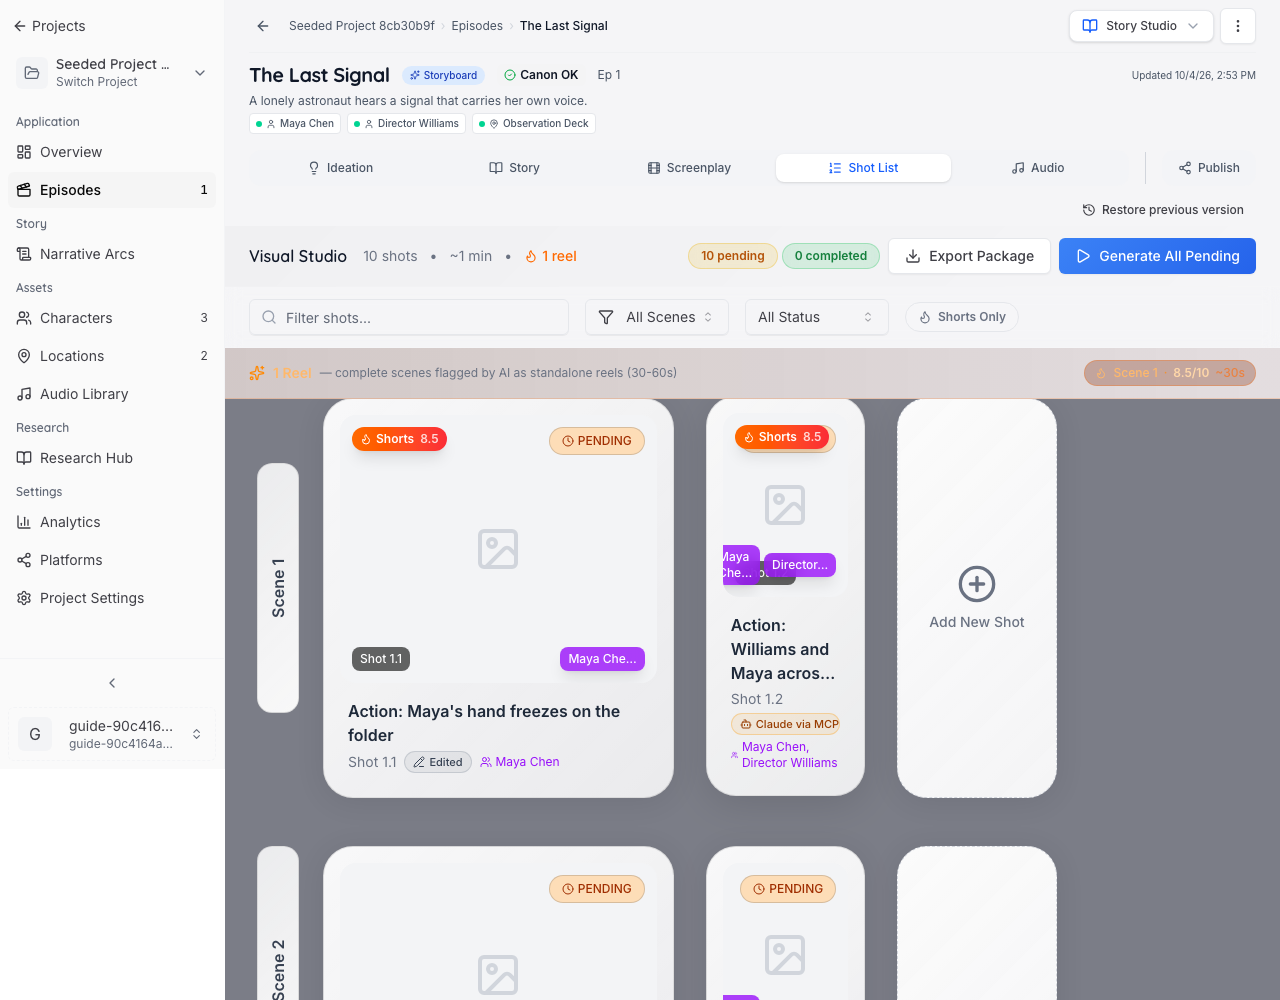
Each story, screenplay, shot and dialogue line carries an origin badge: Gemini, Claude via MCP or ChatGPT via MCP (named after the app that wrote it), or Edited once you change it by hand. The story and screenplay show it as "Written by" under the stage tabs; each shot and dialogue line shows its own.
Going back
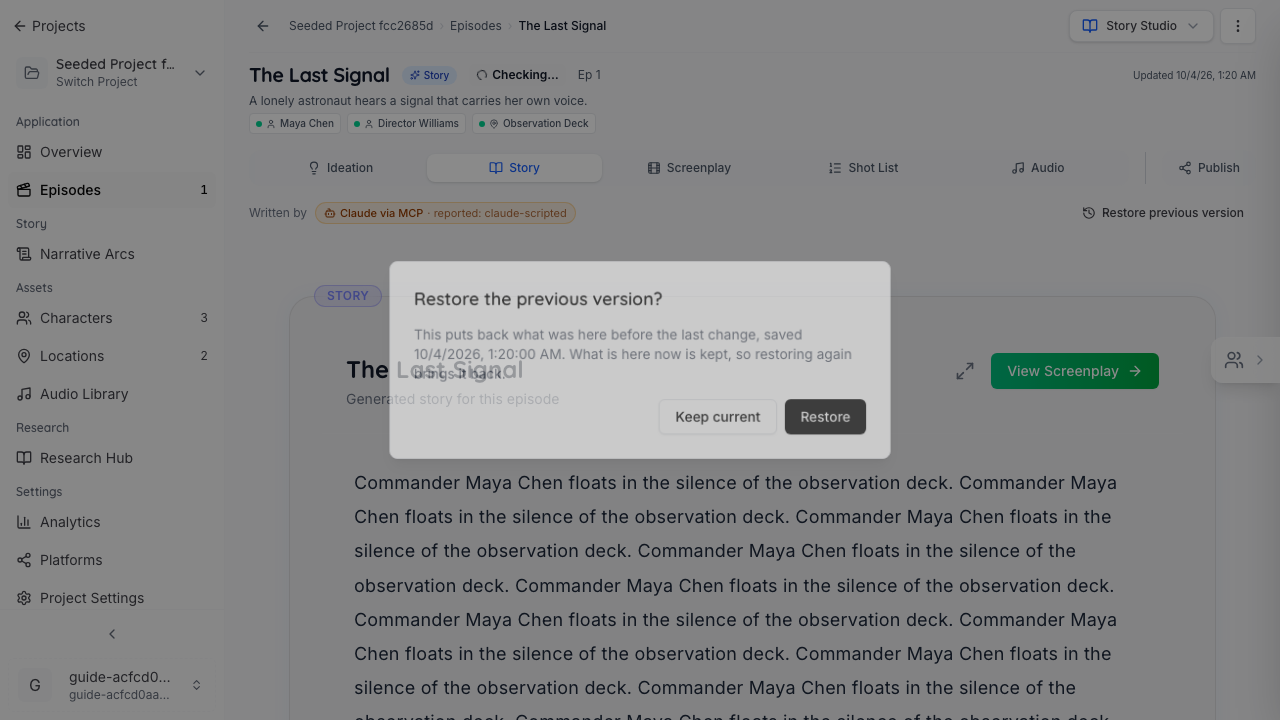
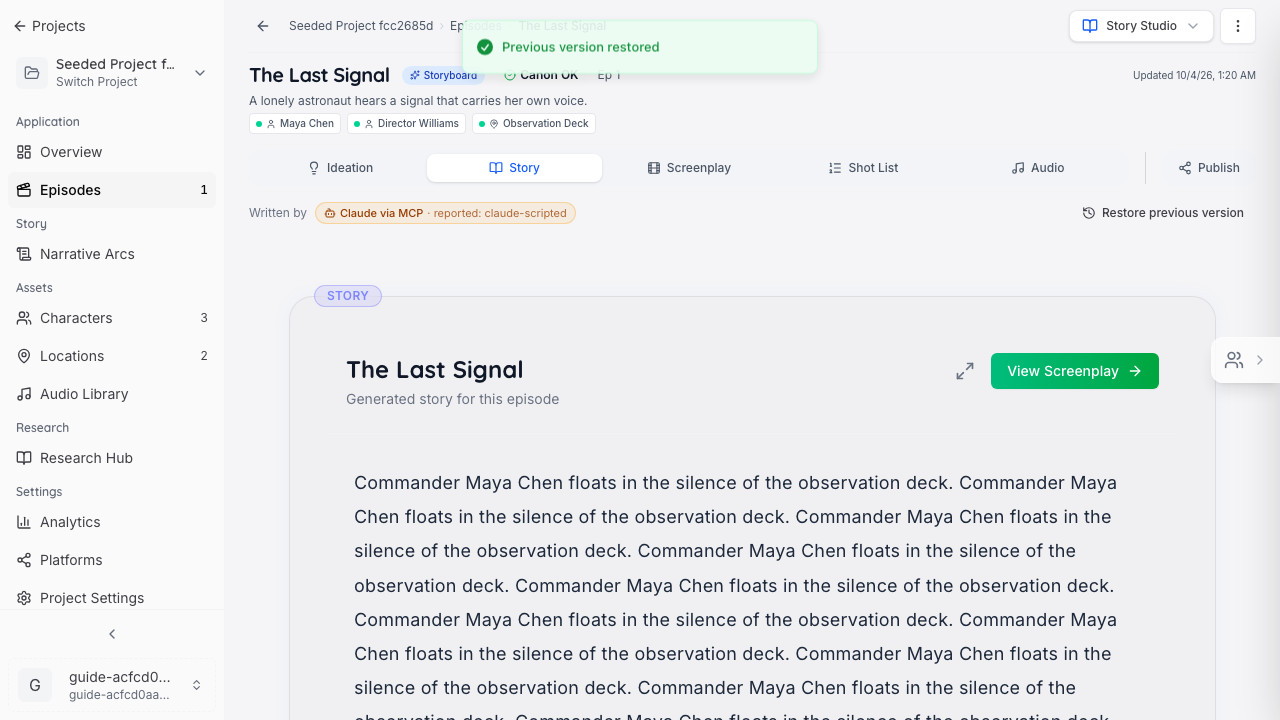
Every time a stage is written, StoryBook keeps the version it replaced. If you prefer what was there before, use Restore previous version, at the top right of that stage's page, then confirm with Restore. Keep current closes the dialog. What was there is kept too, so restoring again brings it back. Restore is paused while the assistant is writing the stage.
Team AI settings
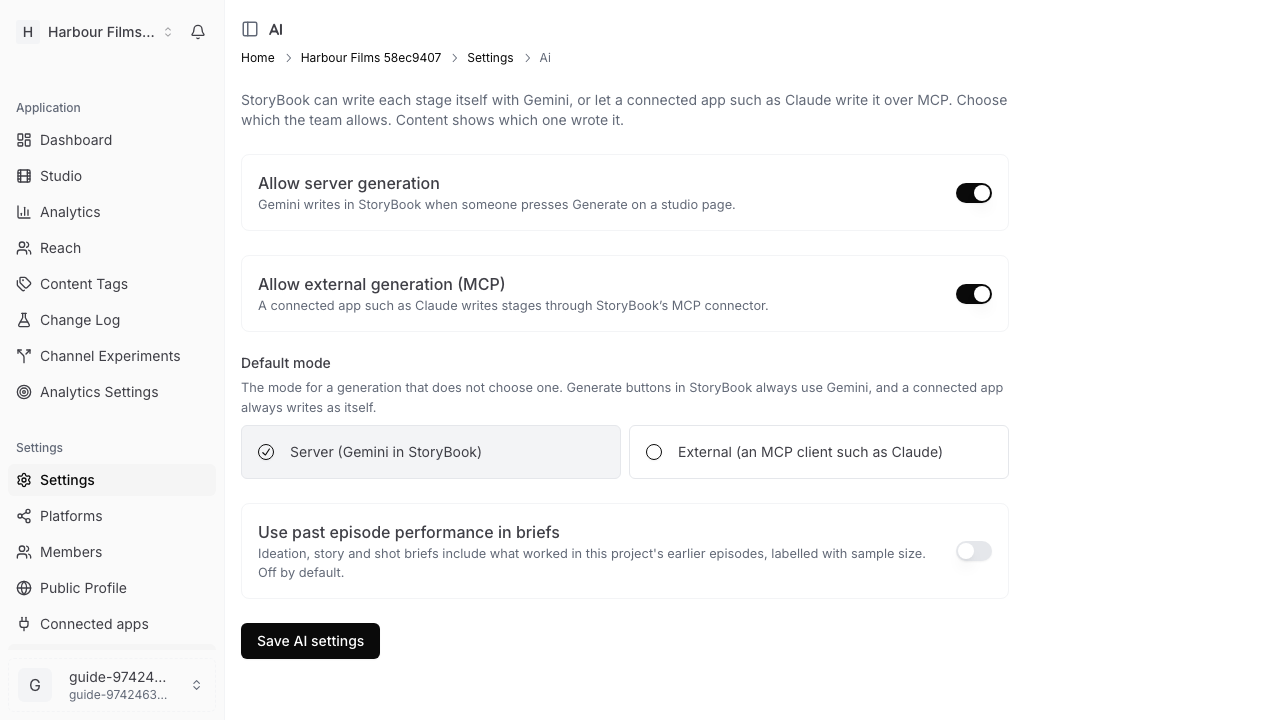
Open Settings → AI in your team. Owners can turn Allow server generation (Gemini in the web app) and Allow external generation (MCP) (Claude or ChatGPT over the connector) on or off, choose the Default mode, turn on Use past episode performance in briefs (off by default; ideation, story and shot briefs then include what worked in the project's earlier episodes, labelled with sample size), and click Save AI settings. At least one must stay on. Members can see the choice but not change it.
Revoke access
- Open Settings → Connected apps in the team.
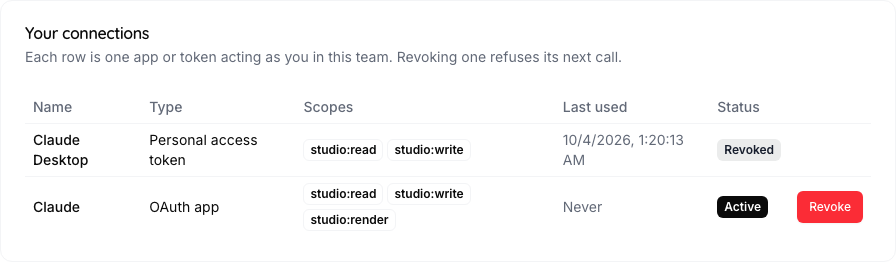
- Under Your connections, find the connection. It shows its scopes, when it was last used, and whether it is active.
- Click Revoke, then confirm.
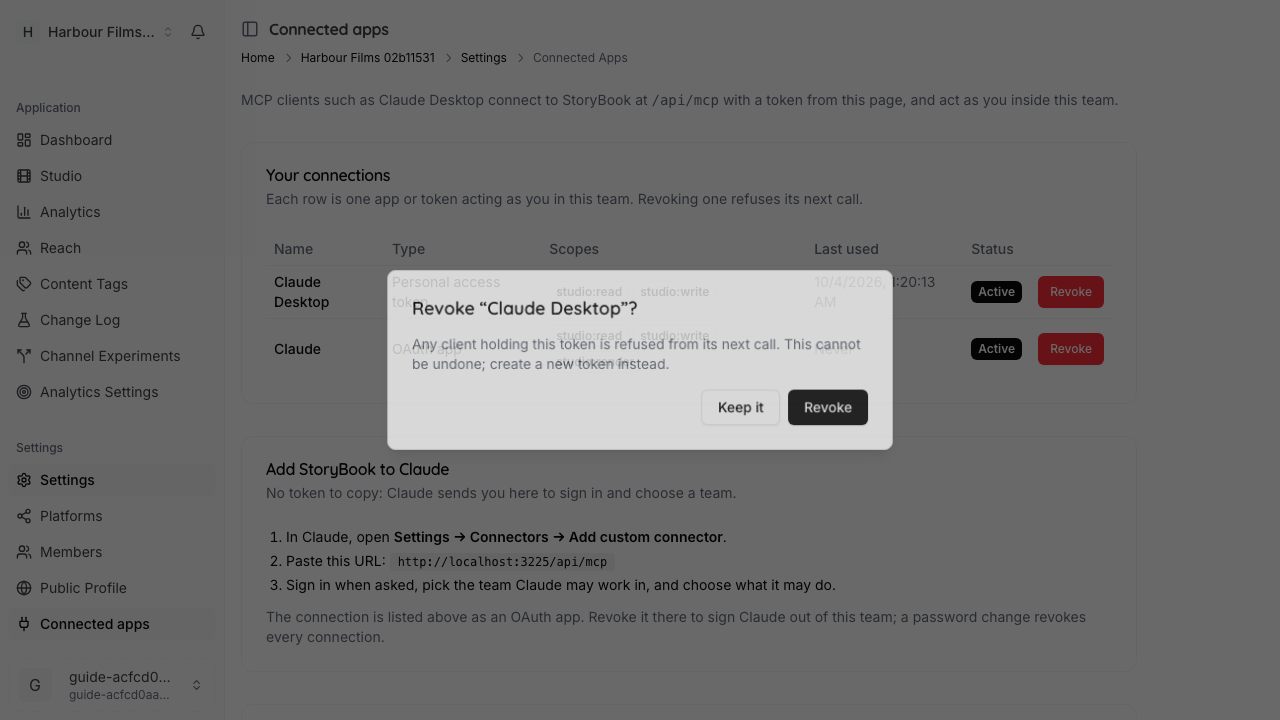
Revoking takes effect on the assistant's next call. Revoked connections stay in the list, marked Revoked, so you have a record.
Changing your password revokes every connection you have, in every team. Add the connector again afterwards.
Limits
- Rate limits. Each connection may make 120 calls a minute, and 60 of those may be writes. Past that, the assistant is told to wait and try again shortly.
- Runs expire. A generation that has been idle for 30 minutes expires. Nothing is saved from it, and the stage is free to start again. Any call the assistant makes on the run keeps it alive.
- No spend cap on the assistant's work. A team's daily Gemini spend cap (Team settings → AI) limits only Generate in StoryBook. An assistant writing through the connector makes no model call from StoryBook and is never capped. ElevenLabs renders are not capped either, so watch
studio:render. - One run per stage. A second generation on the same stage of the same episode is refused until the first one finishes, expires or is cancelled.
- Publishing stays in the web app. The assistant cannot publish an episode. It can read the results afterwards.
- No video rendering. StoryBook does not render video. The assistant can read the video prompts for each shot to use in an outside video tool.